

As the synthetic turf industry incorporates more technologically advanced yarns along with denser more realistic products, it becomes more critical to properly seam turf pieces together.
The design changes have made the process of seaming turf more difficult to hide the two connecting sections of synthetic turf. This month I will educate you about how to install a straight seam by utilizing the Superseam tool.
Critical Terms to Remember:
- Undetectable: not easily seen, barely able to be perceived
- Subgrade Soil Stability: the underlying soils being of quality, firm and steadfast
- Compaction: An increase in the density of something
- Scrim: the backing of a synthetic turf roll that extends beyond the fibers of each side of the roll
- Gauge: an outline of rows of tufted fibers stitched into the backing of synthetic turf rolls.
- Dense Yarn/Fiber Pressure: Increase in density of yarn/fiber creating pressure
- Synthetic Turf Seam Integration: the action of forming two sections of synthetic turf together to unify as one
- Seam Reflection: the dynamics of light (sunlight) creating the connected seam to be visible
- Adhesive Seam Compression: pressure that is applied to seaming area of two sections of synthetic turf onto adhesive glue and seaming tape
***LET’S BEGIN***
Subgrade Soil Stability and its Involvement to a Successful Seam
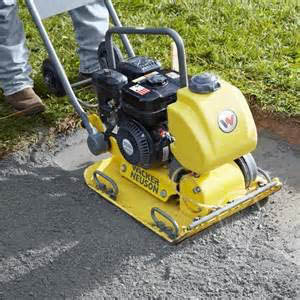 It is very important that soils or grading materials that are placed under the synthetic turf be of quality and can reach approximately 80 percent compaction. Compaction is accomplished by vibrating, tamping and rolling the sub-base materials. This establishes a solid base in which to drive the nails while installing the turf.
Common failures to seam ruptures are caused by underlying soils not being of quality, form and steadfast. Substandard subgrade materials that are unstable cause the underlying subgrade to expand and/or contract.
For Example: Soils that have extensive water intrusion, expansive properties, high in fines, low in aggregate, will cause instability. This may cause the seam to move and separate.
Straight Seaming:
FIRST RULE OF THUMB:
It is always recommended to secure and install the seam first prior to cutting the edges and completing the rest of the installation process.
When you roll out the synthetic turf, you will notice the backing of the synthetic turf extends beyond the fibers on each side. This part is called the “Scrim.” Prior to seaming, it is recommended to remove the scrim material unless you plan to sew the seam.
With playgrounds or fields, it is advised to remove the spikes, nails or staples after the seam glue has cured. Nails and staples can work themselves out of the soil and cause injury.


Make sure you acknowledge the measurement between the gauges before you remove the scrim. If the synthetic turf is manufactured with a 3/8” gauge width, then you will want to connect the two section s of the turf together and keep the 3/8” gauge width during the entire seaming process.
If the synthetic turf is manufactured with a ¾” gauge width, then you will want to connect the two sections of turf together and keep this ¾” gauge width during the entire seaming process. This ensures accurate integration without the seam being too close or too far apart.
Please note: The gauge width dimension is from fiber row to fiber row, so when you are seaming the two sections together, you are connecting them per the manufacture’s gauge dimensions. You can find the gauge specifications for each product on the Synthetic Grass Warehouse web site as well as their particular spec sheets.
If the distance between the fiber rows is spaced too wide, not only will the seam be visible, but it will also become very noticeable once you place your infill materials into the synthetic fibers.
Take a sharp turf/carpet knife and cut between the second or third gauges from the edge “Scrim.” Do not cut into the fibers or too close to the fiber row, as this will cause the fibers to fall out from aggressive foot traffic. By cutting two-to-three rows in from the edge of the scrim, this will give the new seam integrity, strength and a fresh edge.
When both sections are placed together at the proper seam width, secure both sections with spikes, nails or staples approximately 18 inches on both sides of the seam. This will prevent both sections from moving while constructing the seaming process and will allow both sections to be folded over for placement of seaming tape.
NAILING SEAM WITHOUT GLUE:
Depending on the preference, installers may either secure the seam with spikes, staples or nails down the seam edge in a “stitch” pattern.
Always remember: The larger the head of the nail, the more visible the seam will be. Make sure to spread the fibers to allow the head of the nail to pass through the fibers to the base of turf backing or your will create divots by trapping the fibers with the nail heads. This must be a common practice on every nailing procedure.
SEAMING WITH ADHESIVE GLUE:


I strongly recommend placing the adhesive glue on the seam tape early in the morning or late afternoon to prevent yarn shrinkage. The heat of the day will not only cause the seam to expand and contract, it will also cause the synthetic turf glue to set up too quickly or bubble/seep through the seam.
When both sections of synthetic turf are secure and the seam is perfectly in place, fold open both edges of the two sections to expose the subgrade. Place SGW seam tape down the center of the seam and secure with spikes, nails or staples. This will prevent the seam tape from rippling while placing the glue.
**Please note: SGW seam tape is manufactured with a plastic film on one side. This side should be face down and resting on the subgrade materials. The plastic film prevents moisture coming up through the seam tape, which may cause failure. **
SGW carries the best synthetic adhesive on the market today. Superseam Pro withstands freezing temperatures and remains strong and flexible in addition to preventing seam rupture, even during the hottest days.
Place SGW Superseam Adhesive Glue evenly on the seam tape at approximately 1/8” thick.
Depending on preference, installers may either secure the seam with spikes, staples or nails to secure the seam edge in a stitch pattern.
I have always been a firm believer of placing infill bags or weight on top of the seam after gluing for approximately 30 minutes. This will allow for proper compression to allow adhesive/glue to reach the entire backing between the gauges/stitch rows.
REMEMBER: After installing and gluing seams on days with a higher temperature, always inspect the installed seam throughout the curing process. This will prevent the adhesive to bubble/seep up through the seam and drainage holes.

SEAMING WITH THE SUPERSEAM TOOL:
With advanced technology, research and development, synthetic turf manufacturers are creating thicker more realistic artificial grass. These fiber density design changes have made turf seams more difficult to hide in addition to connecting two turf sections. Synthetic turf comes in different styles and thicknesses which changes the seaming process for each product.
The Superseamer tool was invented by myself after experiencing the dreaded turf “Mohawk.” When synthetic turf manufacturers began incorporating the thatch layer (curly fibers between the straight fibers), hiding turf seams became more difficult.


Many installers would over-fibrillate to hide the seam, but would make it worse by manipulating which consequentially dulled the turf and made the seam more visible.
After studying how seams are integrated together, I found that “pressure” was the culprit. Once the scrim is removed, the pressure from the thatch caused the turf fibers to hang outward and when both sections were seamed together, it created the “Mohawk” effect.
The Superseam tool is not for every seam installation, however, when you are installing synthetic turf that has a 50 ounce face weight or greater, don’t take the chance and regret it later. The Superseam tool is available in 6’ and 4’ lengths and can be ordered with a connector bracket. The connector bracket allows the installer to connect multiple Superseam tools together for more efficient seams.
Stayed tuned for next month’s installment of ‘Ask J.W.!’ For more information, contact J.W.: askjw@sgwcorp.com or call 888.846.3598


